Why Small Cracks in Walls Should Never Be Ignored

Cracks in Walls

Cracks in walls may look like a minor cosmetic issue at first, but in reality, they can be early warning signs of deeper structural or moisture-related problems. Many people brush them off, thinking they’re not a big deal. But waiting too long to fix them can mean bigger repair bills, safety worries, and damage to your home over time. Let’s look at why you should pay attention to even tiny cracks and what to do about them.

Are Small Cracks in Walls Really a Problem?

Not every crack means your house is about to fall apart, but they all tell a story. Some are just on the surface, while others suggest problems like the foundation moving, water leaking in, or bad construction.

People often ignore small cracks because:

  • They don’t look serious
  • There’s no water leaking right away
  • Fixing them seems like a waste of time

But, ignoring them can lead to bigger headaches down the road.

Common Types of Wall Cracks and What They Indicate

Understanding the type of crack helps identify the seriousness of the issue.

Hairline Cracks
  • These are super thin and shallow.
  • They usually happen because of plaster shrinking or old paint.
  • They can get worse if water gets in.
Vertical Cracks
  • Usually caused by the house’s foundation settling.
  • They might get bigger over time.
  • You should keep an eye on them and maybe call a professional.
Horizontal Cracks
  • These are more serious than vertical ones.
  • Often related to structural stress or water pushing against the wall.
  • Don’t ignore these.
Diagonal Cracks
  • Common around doors and windows.
  • Happens when weight isn’t evenly distributed or the structure is moving.

Cracks in Walls and Water Seepage: A Dangerous Combination

Small cracks let water into your walls. Once that happens, you might see:

  • Wet spots
  • Paint peeling or bubbling
  • Mold growing
  • Plaster and concrete getting weak

In humid cities water seeping through cracks is a common cause of damaged walls.

Structural Damage Starts Small

Big structural problems often start with small cracks that get ignored. Over time:

  • Steel inside the concrete can rust
  • The concrete gets weaker
  • The house can’t hold as much weight

A small fix can turn into a major project if you don’t take care of it.

Impact on Your Home’s Appearance and Value

Visible cracks reduce the visual appeal of your home. More importantly, they:

  • Lower property value
  • Create a negative impression for buyers or tenants
  • Signal poor maintenance

Even freshly painted walls cannot hide recurring cracks if the root cause is not fixed.

Why Repainting Alone Is Not a Solution

A common mistake is just painting over cracks. They might disappear for a bit, but they usually come back.

This happens because:

  • The water problem isn’t fixed
  • The house is still moving
  • Cheap materials are used to patch the cracks

To really fix cracks, you need to prep the surface, fill them in, seal them, and sometimes waterproof the area.

When Should You Call a Professional?

You should consult a professional if:

  • Cracks keep coming back after you fix them
  • The cracks are getting wider
  • You see wetness or leaks
  • You see cracks on the ceiling or walls that hold up the house

A professional can tell you if the problem is just cosmetic or if it’s structural.

How The Value Homes Fixes Wall Crack Problems

At The Value Homes, we don’t just cover cracks—we solve the problem at its root. Our approach includes:

  • Checking the walls closely
  • Finding out if water or structural issues are the cause
  • Filling cracks with good materials
  • Waterproofing if needed
  • Painting and finishing the job

This ensures long-lasting results, not temporary fixes.

Preventing Cracks in Walls: Simple Tips

While some cracks are unavoidable over time, proper care reduces the risk:

  • Ensure good waterproofing during construction
  • Use quality materials
  • Avoid water stagnation near walls
  • Fix small cracks early

Preventive maintenance always costs less than major repairs.

Final Thoughts

Small cracks might not seem like a big deal, but they’re often a warning sign. Ignoring them can lead to water damage, structural problems, and expensive renovations.

If you see cracks in your walls, don’t wait. Fixing them early saves money, protects your home, and keeps its value up.

Need Expert Help in Chennai?

The Value Homes offers professional construction, renovation, painting, tile & marble laying, and waterproofing services tailored for Chennai homes. Contact us today for a proper inspection and reliable, long-lasting solutions.

Share:

More Posts

House Construction Cost in Chennai 2026

House Construction Cost in Chennai (2026 Guide): Complete Price Breakdown Per Sq Ft

Building your dream home is one of the biggest financial decisions you’ll ever make. Whether you’re planning a compact 1 BHK house or a spacious villa, understanding the house construction cost in Chennai is essential for setting a realistic budget and avoiding unexpected expenses. Construction costs vary based on factors such as land conditions, architectural design, material quality, labour charges, and finishing preferences. In this guide, we’ll explain the average construction cost per square foot, the key cost components, and practical tips to help you build your home wisely. What Is the Average House Construction Cost in Chennai in 2026? The average house construction cost in Chennai typically falls into the following ranges: Construction Type Cost Per Sq Ft Basic Construction ₹1,800 – ₹2,200 Standard Construction ₹2,200 – ₹2,800 Premium Construction ₹2,800 – ₹3,500+ Note: These are estimated construction costs and may vary depending on the project location, design complexity, material selection, labour rates, and market conditions. Estimated Construction Cost Based on House Size House Size Approximate Cost 600 Sq Ft ₹10.8 Lakhs – ₹16.8 Lakhs 800 Sq Ft ₹14.4 Lakhs – ₹22.4 Lakhs 1000 Sq Ft ₹18 Lakhs – ₹28 Lakhs 1200 Sq Ft ₹21.6 Lakhs – ₹33.6 Lakhs 1500 Sq Ft ₹27 Lakhs – ₹42 Lakhs 2000 Sq Ft ₹36 Lakhs – ₹56 Lakhs These estimates generally cover the structural construction of the building. Costs for interiors, compound walls, landscaping, modular kitchens, and premium finishes are usually calculated separately. What Is Included in Construction Cost? Most residential construction projects include: Site Preparation Structural Work Plastering & Flooring Electrical Works Plumbing Works Painting Factors That Affect House Construction Cost in Chennai 1. Location Construction costs differ across Chennai due to labour availability, transportation charges, and accessibility. 2. Soil Condition Weak soil may require deeper foundations, increasing the overall project cost. 3. Building Design Simple designs are generally more economical, while complex elevations, balconies, and custom features increase costs. 4. Material Quality Premium cement, steel, tiles, sanitaryware, doors, windows, and electrical products naturally increase the construction budget but often improve durability and aesthetics. 5. Labour Charges Experienced labour teams may charge more, but they can deliver better workmanship and help reduce costly rework. 6. Finishing Choices Luxury flooring, designer lighting, false ceilings, modular kitchens, wardrobes, and premium bathroom fittings significantly influence the final cost. Hidden Costs Homeowners Often Forget Many people budget only for the construction work and overlook additional expenses such as: Planning for these costs in advance helps avoid financial stress during construction. Tips to Reduce House Construction Cost Without Compromising Quality Why Choosing the Right Construction Company Matters A reliable construction company helps ensure: Choosing an experienced contractor can make the entire building process smoother and more cost-effective. Why Choose The Value Homes? At The Value Homes, we believe every homeowner deserves a well-built home delivered with transparency and quality. Our services include: We focus on quality materials, skilled professionals, efficient project management, and customer satisfaction from planning to project completion. Frequently Asked Questions What is the average house construction cost in Chennai? The average construction cost typically ranges from ₹1,800 to ₹3,500+ per sq ft, depending on the specifications and quality of construction. Does the construction cost include interiors? Generally, standard construction costs do not include modular kitchens, wardrobes, premium interiors, or loose furniture unless specifically mentioned in the contract. How long does it take to build a house? Most individual residential projects are completed within 8 to 12 months, depending on the size, approvals, weather conditions, and project complexity. Can I reduce construction costs? Yes. Proper planning, selecting the right materials, minimizing design changes, and partnering with an experienced construction company can help optimize costs without compromising quality. Conclusion Understanding the house construction cost in Chennai is the first step toward building your dream home with confidence. By planning your budget carefully, choosing quality materials, and working with a trusted construction partner, you can avoid unnecessary expenses and achieve better long-term value. If you’re planning to build a home in Chennai, The Value Homes is here to guide you through every stage—from planning and estimation to construction and finishing—with quality, transparency, and timely delivery.

Tile Laying Process

Step-by-Step Tile Laying Process for Long-Lasting Floors

Creating a durable and attractive home floor is important for both comfort and long-term value. Among the many flooring options available today, tiles remain one of the most popular choices because they are stylish, easy to maintain, and highly durable.  People like them because they look good, are easy to take care of, and last long. But just picking good tiles isn’t enough; the real trick is how well they’re laid down. Many homeowners invest in high-quality tiles but overlook the importance of proper installation. Because of this, their floors may develop cracks, uneven surfaces, loose tiles, and grout issues within a short period. However, if the installation is carried out professionally, tile flooring can remain attractive and durable for many years.  In this blog, we’ll walk you through the complete tile laying process and explain why each step is important for achieving strong, attractive, and long-lasting floors. Understanding the Tile Laying Process Step by Step Tiles are designed to withstand daily wear and tear, but their performance depends largely on how they are installed. Proper tile laying ensures: A well-installed tile floor not only looks professional but also saves homeowners from frequent repairs and replacements. Step 1: Inspecting and Preparing the Surface Successful tile installations start with good surface prep, which is usually skipped but super crucial. Before laying a single tile, installers inspect the floor thoroughly, on the lookout for cracks, bumps, moisture problems, or anything else that might stop the adhesive from working right. The surface is then cleaned thoroughly to remove: If the floor is uneven, leveling compounds may be used to create a smooth and stable base. A properly prepared surface ensures that tiles bond securely and remain stable over time. Skipping this stage can lead to hollow tiles, poor adhesion, and premature damage. Step 2: Measuring the Area and Planning the Layout After the surface is prepared, professionals don’t just start laying tiles from a corner. They take precise measurements and plan the layout first to ensure everything looks great when it’s done. This process helps determine: Center lines are often marked on the floor to create a balanced design. Proper planning ensures that tile cuts along the walls are symmetrical and visually appealing. Good planning also helps reduce material wastage and prevents delays during installation. Step 3: Selecting the Right Tiles and Adhesive Choosing the right tile is just as important as installing it correctly. Different areas of a home require different types of tiles. For example: Ceramic Tiles Ceramic tiles are affordable and suitable for bedrooms and living areas with moderate foot traffic. Vitrified Tiles Vitrified tiles are highly durable, resistant to stains, and ideal for modern homes. They are commonly used in living rooms, kitchens, and commercial spaces. Anti-Skid Tiles These tiles provide better grip and are commonly installed in bathrooms, balconies, and outdoor areas. Along with selecting the right tiles, choosing a suitable adhesive is equally important. Modern tile adhesives offer several advantages over traditional cement mortar, including: The type of adhesive used depends on the tile size, location, and application requirements. Step 4: Applying the Tile Adhesive After selecting the appropriate materials, tile adhesive is applied to the prepared surface. The adhesive is mixed according to the manufacturer’s instructions to achieve the correct consistency. It is then spread evenly using a notched trowel. The grooves created by the trowel help distribute the adhesive uniformly and improve tile bonding. Professional installers ensure: Uneven adhesive application can result in weak spots beneath the tiles, increasing the risk of cracks and breakage later. Step 5: Laying the Tiles Carefully At this stage, the flooring design begins to take shape. Tiles are carefully placed onto the adhesive according to the planned layout. In most cases, installers start from the center of the room and work outward to ensure a balanced and visually appealing finish.  Each tile is set in firmly to make sure it sticks properly. To keep uniform gaps, they use spacers – which help for grout and deal with tiny expansion and contraction due to temperature changes. Installers check alignment and levels throughout to get that smooth surface. Being meticulous here really matters since it hugely affects how the final floor looks. Step 6: Cutting Tiles for Edges and Corners Very few rooms are perfectly square. Most tile installations require some cutting around: Accurate measurements are essential before making any cuts. Professional installers use specialized tile cutters or wet saws to achieve precise cuts and clean edges. Properly cut tiles create a seamless appearance and contribute to a professional finish. Poorly cut tiles, on the other hand, can affect the overall beauty of the floor. Step 7: Grouting the Tile Joints Once the adhesive has dried sufficiently, the spaces between the tiles are filled with grout. Grouting serves several important purposes. It helps: The grout is carefully pressed into the joints using a rubber float. Excess grout is then removed before it hardens. Today’s grout options are available in a wide range of colors, allowing homeowners to either match the tile color or create attractive contrasts. A properly grouted floor not only looks better but also lasts longer. Step 8: Cleaning and Final Finishing After grouting is completed, the floor is cleaned thoroughly. This stage involves: The final cleaning process reveals the true beauty of the installed flooring. Professional finishing creates a polished appearance and ensures that the entire installation meets quality standards. Step 9: Allowing Proper Curing Time One of the most common mistakes homeowners make is using the floor too soon after installation. Tile adhesive and grout require time to cure properly. Depending on the materials used, installers may recommend: Allowing adequate curing time strengthens the bond between the tiles and the substrate, ensuring long-term performance. Patience during this stage can significantly increase the lifespan of the flooring. Benefits of Professional Tile Installation While DIY videos make tile installation appear simple, achieving professional results requires experience and expertise. Hiring professionals offers several advantages: Superior Finish Experienced installers ensure

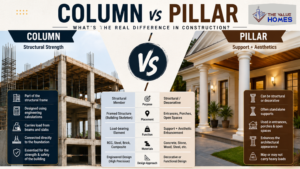
Column vs Pillar

Column vs Pillar: What’s the Real Difference in Construction?

During the process of building a house, most people come across terms such as columns and pillars, which are used interchangeably. However, knowing the Column vs Pillar difference is vital since both have different purposes and functions in construction projects. Although they may appear alike, columns and pillars vary in their purposes, uses, designs, and function. Understanding these variations will help one become knowledgeable when choosing between these two terms during construction, thus making the right choices. Understanding the Basics of Columns and Pillars Columns and pillars are vertical structural members that are used in construction projects to support structures. The main function of these two is transferring loads from the upper parts of the building to its foundation. Despite having similar purposes, columns and pillars have some significant variations. The definition of a column is a structural element that is designed to carry compressive loads. In construction, it is used as a structural element in buildings, and it is specifically designed according to the loading requirements of the structure. Pillar, on the other hand, is a free-standing vertical structure. Pillars are mostly used for their architectural appearance in buildings. This understanding is key in construction projects today. Column vs Pillar – Key Differences The major distinction between a column and a pillar comes in terms of structural function and positioning. Columns Pillars In other words, all columns can work as pillars in some situations, but all pillars may not necessarily be structural columns. What Is a Column in Construction? A column is among the most vital structural elements in modern constructions. The column transmits the load from the roof, slabs, and beams to the footing and foundation. Columns are generally made using: In residential houses, the most common type of columns is RCC columns. Features of a Column Without properly designed columns, a building may become structurally weak and unsafe. What Is a Pillar in Construction? A pillar is a vertical supporting structure which may be functional, aesthetic, or both. Pillars have been in use since time immemorial, and can be found in temples, old buildings, verandas, and entrances among other places. Modern houses also make use of pillars to enhance the beauty of their structures while at the same time offering support to the roof or portico. Features of a Pillar Decorative pillars are normally made using concrete, stone, wood, or metal depending on the design of the house. Importance of Columns in Modern Homes – Column vs Pillar Understanding Columns are very significant in modern RCC framed buildings because they form the backbone of the buildings. Benefits of Properly Designed Columns Well-designed columns are necessary in ensuring safety and longevity of buildings. Importance of Pillars in Home Design Pillars are often used to enhance the appearance of a property while providing support in selected areas. Benefits of Pillars Many luxury homes use decorative pillars to create a premium look. Materials Used for Columns and Pillars The choice of materials depends on the structural requirement, design preference, and budget. Common Materials for Columns Common Materials for Pillars In most residential projects, RCC remains the preferred material because of its strength, durability, and cost-effectiveness. Can a Pillar Be Called a Column? It is one of the most frequently asked questions by homeowners. From a technical point of view, there may be cases when a structural pillar that bears any loads behaves like a column. Nevertheless, in engineering science, columns are structural components that bear loads in a frame structure. Pillars are generally used in a more broad sense and may be decorative vertical constructions. That is why professional civil engineers and architects use the term “column” to refer to such structures. Common Mistakes People Make Homeowners are usually concerned about the aesthetic side of pillars but forget about proper column construction. Common Construction Mistakes These mistakes can seriously affect the stability of a building. Which Is More Important in House Construction? Modern housing requires more attention to columns than to pillars since columns have a direct influence on the stability of the building. Pillars mainly contribute to: A strong column layout designed by experienced structural engineers ensures that the house remains stable for many years. How Professionals Decide Column Placement Column placement is carefully planned based on: Improper positioning of the columns will add to the expenses of the construction and will decrease efficiency. This is the reason why the role played by professional planners and engineers becomes very crucial during the construction of houses. Conclusion Column vs Pillar knowledge can be advantageous to homeowners when constructing their houses. Even though both are vertical structures, while columns are mainly meant for supporting weight and making the house stable, pillars are mostly meant for support and adding beauty to the house. In the case of RCC houses, proper construction of columns makes the house more secure, strong, and durable. On the other hand, pillars help in adding beauty to the house. Using the best construction techniques and materials will result in construction of a house that is both beautiful and durable. The Value Homes ensures that each and every one of its projects is well balanced in terms of structure and construction quality.

Repainting Tips for a Perfect Home

Repainting Tips: When Should You Repaint Your House?

Repainting tips are essential for every homeowner who wants to maintain their home’s appearance and durability. Many people wonder when should you repaint your house, especially when dealing with fading walls, peeling paint, or weather damage. Understanding the Importance of Repainting While painting enhances the appearance of your home, it is also an effective barrier against external factors. Good paint acts as a protective shield for your walls against dust, water, sun, and other elements. Eventually, even the most durable paint will weaken from constant exposure to the environment. Consistent repainting guarantees that your house remains safeguarded and attractive. Failure to repaint your house could result in more serious problems in the future. Common Signs Your House Needs Repainting Some of the best indicators that it is time for your home to be repainted include some visible signs. Peeling or Cracking Paint When paint flakes off or peels, it reveals the surface underneath and leaves it open to moisture and damage. Fading Colors As a result of sun exposure and adverse weather conditions, fading colors give an old look to your house. Damp Patches and Stains These stains point to potential leakage problems, which need to be fixed in addition to painting. Chalking If you notice a powdery residue when touching the wall, it means the paint is deteriorating and needs replacement. When Should You Repaint Your House Based on Area? To determine when it is time to repaint your house, it is essential to consider various areas and factors about them. Exterior Walls Exterior walls are constantly exposed to sunlight, rain, and pollution. It is recommended to repaint them every 5 to 7 years, or sooner if damage appears. Interior Walls Interior walls typically need repainting every 3 to 5 years, depending on wear and tear. High-Traffic Areas Spaces like kitchens, living rooms, and hallways experience more usage and may require repainting every 2 to 3 years. Impact of Weather on Paint Durability Weather conditions play a major role in how long your paint lasts, especially in cities like Chennai. Because of these factors, homes in humid and coastal regions often require more frequent repainting compared to other areas. Benefits of Repainting on Time Repainting your home regularly offers several advantages beyond just aesthetics. Protects Your Walls A fresh coat of paint acts as a barrier against environmental damage, preventing moisture from entering the walls. Enhances Appearance New paint instantly refreshes your home, making it look clean, modern, and well-maintained. Increases Property Value A freshly painted house creates a positive impression and can improve resale value. Prevents Expensive Repairs Timely repainting helps identify and fix minor issues before they turn into major problems. Following the right repainting tips can help homeowners save money and extend the life of their walls. Best Time of Year to Repaint Your House Choosing the right time of year is important for achieving long-lasting results. Dry conditions help paint adhere better and dry faster, resulting in a smoother finish. Professional Painting vs DIY While DIY painting may seem like a cost-saving option, professional painting services often deliver better results. Advantages of Hiring Professionals Working with experienced companies like The Value Homes ensures that your home gets a durable and high-quality finish along with expert guidance. Expert Tips for Long-Lasting Paint To extend the life of your paint and maintain your home’s appearance: These simple practices can significantly increase the lifespan of your paint. Top Repainting Tips for Long-Lasting Results When Repainting Alone Is Not Enough However, there may be instances where repainting alone will not be sufficient. In case your home experiences dampness, cracks, or leaking, then other actions such as waterproofing and structural repairs may become necessary. Disregarding the problem and painting over it will only result in repeated damages and cost you more money. It is advisable to deal with the core issue before painting your house. Conclusion The importance of learning about repainting tips and figuring out when should you repaint your house cannot be overemphasized. From recognizing the need to repaint to doing it at the perfect time and using the right approach, repainting becomes very important. Properly done repainting will go a long way in preserving your property’s beauty, value, and longevity. For the best results, working with trusted experts like The Value Homes ensures high-quality materials, proper execution, and long-lasting finish for your home.

Send Us A Message

Scroll to Top